
Dometic Thermostat Manual: A Comprehensive Guide (Updated 04/09/2026)
This guide provides detailed information on Dometic thermostats‚ covering installation‚ operation‚ troubleshooting‚ and advanced repair techniques for various models.
Dometic thermostats are integral to maintaining comfortable climates within RVs‚ boats‚ and other mobile living spaces. These systems control both cooling and heating functions‚ ensuring optimal temperature regulation. Recent discussions highlight common replacements like the Dometic Penguin II AC unit‚ often paired with existing Dometic thermostats‚ though noise levels are a frequent concern.
Understanding your Dometic thermostat is crucial for efficient operation and troubleshooting. Models like the DM2652 refrigerator thermostat‚ while basic‚ require attention to potential issues like repeatedly blown thermal fuses‚ often linked to boiler overheating. Newer compressor refrigerators‚ such as the DMC 4101‚ utilize surface-mounted thermostats powered by AAA batteries‚ offering a 12V DC operation. This manual aims to provide comprehensive guidance for all Dometic thermostat users.
Understanding Dometic Climate Control Systems
Dometic climate control encompasses a range of systems‚ from traditional 120V AC units like the Penguin II to modern 12V DC compressor refrigerators (DMC 4101). These systems often integrate with thermostats for precise temperature management. Older units‚ while reliable‚ can present challenges like increased noise‚ prompting users to explore add-ons like the Wacko AC Silencer.
Refrigerator systems‚ such as those utilizing the DM2652 thermostat‚ operate on both 120V and gas‚ requiring careful monitoring for issues like thermal fuse failures‚ potentially indicating overheating. Proper coolant flow and functional thermal switches are vital. Understanding the interplay between the thermostat‚ cooling source‚ and associated components—even related systems like the MasterFlush 7640 toilet’s electrical schematic—is key to effective diagnosis and maintenance.

Dometic Thermostat Models & Compatibility
Dometic offers diverse thermostats‚ including the DMC 4101 for 12V refrigerators and the DM2652 for older models; compatibility with existing AC units is crucial.
DMC 4101 12V DC Compressor Refrigerator Thermostat
The Dometic DMC 4101 is specifically designed for 12V DC compressor refrigerators‚ representing a shift from traditional gas/electric models like the NDR 1062. This thermostat is surface-mounted and requires two AAA batteries for operation. It features a simple‚ yet effective‚ control scheme.
The unit connects to the refrigerator via wiring‚ enabling temperature regulation. The thermostat displays the current room temperature and allows users to set their desired temperature by rotating a dial. This model is a newer addition to the Dometic lineup‚ offering a modern solution for DC-powered refrigeration systems in RVs and other applications. Users replacing older units should note the 12V DC power requirement.
DM2652 Refrigerator Thermostat: Operation & Troubleshooting
The Dometic DM2652 refrigerator thermostat is a basic model featuring power on/off and auto/gas selection buttons. Operation involves selecting the desired power source – 120V or gas – and allowing the thermostat to regulate temperature. A common issue reported by RVers is the thermal fuse repeatedly blowing‚ even with intact board fuses.
This often occurs on both gas and electric modes. Potential causes include boiler overheating‚ blocked coolant flow‚ or a faulty thermal switch opening at too low a temperature. Troubleshooting involves checking for obstructions and using a temperature gun to assess boiler temperature. Understanding the auto/gas switch function is crucial for proper operation.
Compatibility with Older Dometic AC Units (Penguin II)
Many RV owners replacing failing Dometic 13.5 AC units are considering the Penguin II as a common replacement option. However‚ compatibility with existing Dometic thermostats is a key concern. While the Penguin II can work with older thermostats‚ numerous RVers report a significant increase in noise levels compared to previous models.
Even with the addition of noise-reducing accessories like the Wacko AC Silencer‚ the Penguin II often remains louder. Careful consideration should be given to noise tolerance and the potential need for supplemental sound dampening when upgrading. Confirming thermostat compatibility before purchase is highly recommended to avoid further issues.

Installation & Setup
Proper installation involves secure thermostat mounting‚ correct wiring connections‚ and battery installation (using AAA batteries) before initial power-up and system checks.
Thermostat Mounting & Wiring
Successful thermostat operation begins with a secure and appropriate mounting location‚ ensuring it’s away from direct sunlight or drafts that could skew temperature readings. The Dometic thermostat is typically surface-mounted‚ requiring careful attention to wire routing. Wiring involves connecting the thermostat to the furnace using two wires at the wall mounting location.
Ensure power is disconnected before commencing any wiring work. Double-check the polarity and secure connections to prevent shorts or malfunctions. Compatibility with existing wiring is crucial‚ especially when replacing older Dometic AC units like the Penguin II; Incorrect wiring can lead to inaccurate temperature control or complete system failure‚ necessitating professional assistance. Always refer to the specific model’s wiring diagram.
Battery Installation (AAA Batteries)
Many Dometic thermostats‚ particularly surface-mounted models like those used with certain compressor refrigerators (DMC 4101)‚ require battery power to operate. These thermostats utilize standard AAA batteries as their power source. Proper battery installation is essential for accurate temperature readings and reliable system control.
Before installing‚ ensure the thermostat is powered off. Locate the battery compartment‚ typically on the back or side of the unit. Insert two AAA batteries‚ observing the correct polarity (+ and -) as indicated inside the compartment. A secure fit is vital to maintain a consistent power supply. Replace batteries when the low battery indicator appears to prevent operational issues or inaccurate readings.
Initial Power-Up & System Check
After installing batteries or connecting to a power source‚ initiate the thermostat’s power-up sequence. The display should illuminate‚ indicating the unit is receiving power. Verify the displayed temperature aligns with the ambient room temperature – a significant discrepancy suggests a potential sensor issue.
Test the thermostat’s functionality by attempting to adjust the target temperature using the dial. Confirm the system responds accordingly‚ initiating cooling or heating as selected. For refrigerators (like those using the DM2652)‚ observe if the unit switches between power modes (120V/Gas) as expected. A thorough initial check ensures proper operation before relying on the thermostat for consistent climate control.

Operating Your Dometic Thermostat
This section details how to effectively use your Dometic thermostat‚ including reading temperatures‚ setting desired levels‚ and controlling furnace operations efficiently.
Temperature Display & Reading
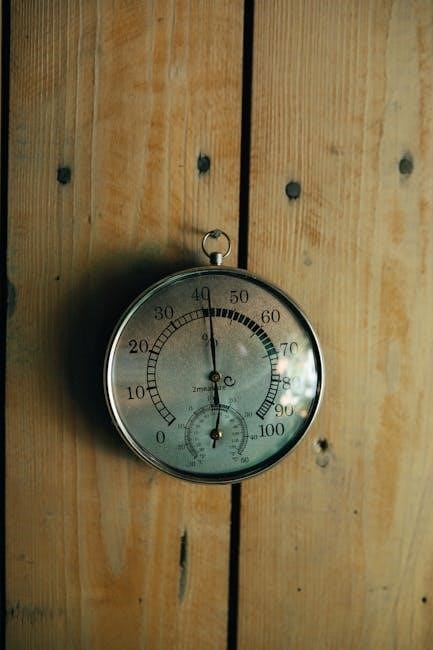
Your Dometic thermostat features a clear and concise temperature display‚ providing real-time monitoring of the ambient temperature within your RV or vessel. The display shows the current room temperature‚ allowing you to quickly assess the climate control status. Understanding how to accurately read this display is crucial for optimal comfort and energy efficiency.
The thermostat utilizes a digital readout‚ presenting the temperature in Fahrenheit. Ensure the display is unobstructed for easy viewing. Note that the displayed temperature represents the temperature near the thermostat itself; variations may exist in other areas of the space. Regularly checking the display allows for proactive adjustments to maintain your preferred temperature setting‚ contributing to a comfortable environment.
Setting the Target Temperature (Dial Operation)
Adjusting the desired temperature with your Dometic thermostat is straightforward‚ utilizing a rotary dial for precise control. To set the target temperature‚ simply rotate the dial clockwise to increase the temperature and counter-clockwise to decrease it. The currently selected target temperature is prominently displayed alongside the current room temperature.
Small adjustments to the dial can make a significant difference in comfort levels. Allow sufficient time for the system to respond to changes – typically several minutes – before making further adjustments. Experiment to find the optimal setting for your personal preference and the prevailing environmental conditions. Remember‚ the dial controls the desired temperature‚ not the fan speed.
Furnace Control & Operation
Your Dometic thermostat also manages the operation of your RV’s furnace‚ providing consistent and comfortable heating. The thermostat connects to the furnace using two wires at the wall mounting location‚ enabling it to switch the heating system on and off as needed to maintain the set temperature.
When the thermostat detects a temperature drop below the target setting‚ it signals the furnace to ignite and begin producing heat. Once the desired temperature is reached‚ the thermostat will automatically shut off the furnace; Ensure the furnace is properly vented and maintained for safe and efficient operation. The thermostat’s display will indicate when the furnace is actively running.
Troubleshooting Common Issues
This section addresses frequent problems with Dometic thermostats‚ including refrigerator thermal fuse failures‚ overheating‚ blocked coolant flow‚ and potential switch malfunctions.

Refrigerator Repeatedly Blowing Thermal Fuse (DM2652)
If your Dometic DM2652 refrigerator repeatedly blows the thermal fuse‚ even on both gas and electric modes with intact board fuses‚ a deeper investigation is required. Experienced RVers suggest the issue likely stems from the boiler overheating. This overheating can be caused by restricted coolant flow within the refrigeration system‚ preventing efficient heat dissipation.
Another potential culprit is a faulty thermal switch or fuse that’s opening at a temperature lower than specified. To diagnose this‚ carefully use a temperature gun to check the boiler temperature. Elevated temperatures confirm overheating. Addressing blocked coolant lines or replacing the thermal switch/fuse are crucial steps to resolve this recurring issue and restore proper refrigerator function.
Identifying Overheating in Refrigerators
Overheating within a Dometic refrigerator‚ particularly models like the DM2652‚ can manifest as repeatedly blown thermal fuses. A key diagnostic tool is a temperature gun‚ used to directly measure the boiler temperature. Elevated readings strongly indicate an overheating problem requiring immediate attention.
Beyond the temperature gun‚ observe for unusual operational patterns – the refrigerator cycling on and off frequently‚ or failing to maintain a consistent cold temperature. Restricted coolant flow is a common cause‚ hindering heat dissipation. A faulty thermal switch‚ prematurely triggering a shutdown‚ is another possibility. Addressing these issues promptly prevents further damage and ensures efficient cooling performance. Regular monitoring helps identify potential overheating before it escalates.
Blocked Coolant Flow & Thermal Switch Issues
A frequent cause of Dometic refrigerator malfunctions‚ especially the DM2652‚ is restricted coolant flow within the cooling system. This blockage prevents efficient heat transfer‚ leading to overheating and frequent thermal fuse failures. Inspect the coolant lines for kinks‚ obstructions‚ or sediment buildup.
Simultaneously‚ a malfunctioning thermal switch can incorrectly detect overheating‚ prematurely shutting down the refrigerator. This switch’s calibration is crucial; if it opens at too low a temperature‚ it mimics an actual overheating event. Thoroughly test the thermal switch’s functionality and replace it if necessary. Addressing both coolant flow and thermal switch integrity is vital for reliable refrigerator operation.

Advanced Troubleshooting & Repair
This section details complex diagnostics‚ including electrical schematics for related systems like the MasterFlush 7640 toilet‚ and boiler temperature checks.
MasterFlush 7640 Toilet Electrical Schematic (Related System)
While seemingly unrelated to thermostats‚ the Dometic MasterFlush 7640 toilet’s electrical system occasionally presents issues that can mimic power supply problems affecting the climate control system. RV owners have reported complete toilet failure – no flush cycle‚ no water entering the bowl‚ and no macerator activation. Finding a readily available‚ official electrical schematic and parts list for this model proves challenging‚ often requiring direct contact with Dometic support or specialized RV repair forums.
Troubleshooting begins with verifying power to the unit. A lack of power could indicate a tripped breaker‚ a blown fuse‚ or a wiring issue shared with other 12V systems. Investigating the toilet’s electrical components can sometimes reveal broader electrical faults within the RV‚ potentially impacting the Dometic thermostat’s operation. Remember to disconnect power before any electrical inspection.
Checking Boiler Temperature with a Temperature Gun
When troubleshooting refrigerator issues‚ particularly with the DM2652 model‚ a non-contact infrared temperature gun becomes an invaluable diagnostic tool. Repeatedly blown thermal fuses often point to boiler overheating. Using the temperature gun‚ carefully measure the boiler’s surface temperature in multiple locations. Compare these readings to the expected operating range (consult Dometic documentation if available).
Significantly elevated temperatures suggest blocked coolant flow within the refrigeration system‚ preventing efficient heat dissipation. A faulty thermal switch or fuse opening at an inappropriately low temperature can also cause premature shutdowns. This method helps pinpoint the source of overheating‚ guiding further investigation into coolant lines‚ the thermal switch‚ and the overall refrigeration cycle’s efficiency.
Diagnosing Power Issues (120V vs. 12V)
Dometic refrigerators and AC units operate on either 120V AC (shore power) or 12V DC (battery power). Correctly identifying the power source is crucial for troubleshooting. If a unit fails to operate‚ first verify the power supply. Check the circuit breaker for 120V systems and battery voltage for 12V systems.
The DMC 4101 refrigerator specifically runs on 12V DC‚ eliminating the 120V AC side of the equation. For units capable of both‚ ensure the selector switch is set to the appropriate source. A multimeter is essential for accurately measuring voltage at various points in the system‚ confirming power delivery to the thermostat and appliance components. Incorrect voltage can cause malfunctions or damage.
Noise Reduction & Optimization
Addressing noise‚ particularly with Penguin II AC units‚ is a common concern; solutions include utilizing noise-reducing add-ons like the Wacko AC Silencer for quieter operation.
Addressing Noise Concerns with Penguin II AC Units
Many RV owners replacing older Dometic AC units with the Penguin II model report a noticeable increase in operating noise. While the Penguin II offers improved efficiency‚ its fan design and construction can contribute to a louder sound profile compared to older units. This is a frequently discussed issue within the RV community.

Fortunately‚ several mitigation strategies exist. A popular solution is the installation of a Wacko AC Silencer‚ a noise-reducing add-on specifically designed for the Penguin II. Other approaches include ensuring proper mounting to minimize vibration transfer and checking for any loose panels or components that might rattle during operation. Careful installation and attention to detail can significantly reduce noise levels‚ enhancing the overall RV experience.
Using Noise-Reducing Add-ons (Wacko AC Silencer)
The Wacko AC Silencer is a commonly recommended accessory for Dometic Penguin II air conditioning units‚ specifically addressing noise complaints. This add-on works by redirecting airflow and dampening vibrations‚ resulting in a quieter operation. Installation typically involves replacing the existing AC shroud with the Wacko unit‚ a process generally considered straightforward for DIY enthusiasts.
RV owners report varying degrees of noise reduction with the Wacko Silencer‚ but many find it significantly improves comfort levels. While it doesn’t eliminate all noise‚ it effectively reduces the high-frequency sounds often associated with the Penguin II. Proper installation is crucial for optimal performance; ensuring a secure fit and sealing any gaps will maximize the silencer’s effectiveness.

Resources & Support
Access Dometic manuals online for detailed product information and troubleshooting guides. For further assistance‚ contact Dometic customer support directly for expert help.
Finding Dometic Manuals Online
Locating the correct Dometic thermostat manual is crucial for proper operation and maintenance. Dometic’s official website is the primary resource‚ offering a comprehensive archive of manuals searchable by model number. Often‚ users can find manuals for discontinued models as well.
Beyond the official site‚ numerous RV-focused forums and communities host shared document libraries; These can be valuable for finding manuals not readily available elsewhere‚ or for accessing user-created guides and troubleshooting tips.
When searching‚ be precise with the model number (e.g.‚ DMC 4101‚ DM2652) to ensure you download the correct documentation. PDF format is the most common‚ allowing for easy viewing and printing. Remember to verify the manual’s date to confirm it aligns with your thermostat’s production year.
Contacting Dometic Customer Support
When online resources prove insufficient‚ direct contact with Dometic customer support is recommended. Dometic offers multiple channels for assistance‚ including a dedicated phone support line and an online contact form accessible through their official website. Be prepared to provide your thermostat’s model number and date of purchase for efficient service.
RV-specific forums often share experiences with Dometic support‚ offering insights into response times and the effectiveness of different contact methods. Some users report success utilizing Dometic’s regional support centers for localized assistance.
Before contacting support‚ gather detailed information about the issue‚ including any error codes displayed and the steps you’ve already taken to troubleshoot. This will streamline the process and help the support team provide a targeted solution.