
Welcome to the Alarm.com Thermostat User Manual. This guide provides comprehensive instructions for installing, operating, and maintaining your smart thermostat. Learn about its energy-efficient features, smart home integration, and advanced temperature control modes. Refer to this manual for troubleshooting common issues and ensuring optimal performance year-round.
1.1 Overview of the Alarm.com Smart Thermostat
The Alarm.com Smart Thermostat is a cutting-edge, energy-efficient device designed to optimize home comfort and energy savings. It offers seamless integration with smart home systems, allowing users to control temperature settings remotely via the Alarm.com app; The thermostat features advanced temperature control modes, including Heat, Cool, and Auto, ensuring precise climate management. With its intuitive interface and compatibility with Z-Wave networks, it easily connects to other smart devices, enhancing home automation. The device also supports scheduling and geofencing, adapting to your lifestyle for optimal energy usage. Additional features include humidity monitoring and special modes like Away, Sleep, and Vacation, providing tailored comfort and efficiency. Its high-definition touchscreen display offers a user-friendly experience, while voice control compatibility further enhances convenience. By combining smart technology with energy-saving capabilities, the Alarm.com Smart Thermostat is an ideal solution for modern homes.
1.2 Importance of Reading the Manual
Reading the Alarm.com Thermostat User Manual is essential for understanding the device’s full capabilities and ensuring proper installation, operation, and maintenance. The manual provides detailed instructions for setting up the thermostat, configuring smart home integrations, and utilizing energy-saving features. It also covers troubleshooting common issues, such as error codes and connectivity problems, helping you resolve them efficiently. By familiarizing yourself with the manual, you can optimize the thermostat’s performance, reduce energy consumption, and extend its lifespan. Additionally, the manual includes safety precautions and installation guidelines to prevent potential hazards. Whether you’re a homeowner or an installer, this guide is your go-to resource for maximizing the thermostat’s features and ensuring seamless operation. Take the time to review it thoroughly to get the most out of your Alarm.com Smart Thermostat experience.
1.3 Compatibility and System Requirements
The Alarm.com Thermostat is designed to work with standard 24V AC HVAC systems, including gas, electric, heat pumps, and dual-fuel systems. It is compatible with most residential heating and cooling setups, but it is essential to verify your system’s voltage and configuration before installation. The thermostat is not compatible with high-voltage systems (120V or 240V) or systems using wire nuts. For smart home integration, it requires a Z-Wave network and connectivity through the Alarm.com app or website. Ensure your system meets these requirements to avoid installation issues. Proper compatibility ensures optimal performance, energy efficiency, and safe operation. Always consult a professional if unsure about your system’s specifications or wiring configuration. This ensures a seamless setup and full functionality of the thermostat’s advanced features.

Installation and Setup
Follow the step-by-step guide to install and set up your Alarm.com Thermostat. Take photos of existing wires before disconnecting them for reference. Ensure compatibility with your HVAC system and complete the setup using the Alarm.com app or website for remote control and smart home integration.
2.1 Pre-Installation Precautions
Before installing your Alarm.com Thermostat, ensure the system is powered off at the circuit breaker to avoid electrical hazards. Verify that your HVAC system is compatible with the thermostat and operates on 24 VAC. If your system is labeled as 120 V or 240 V, or uses wire nuts, it is high voltage and not compatible. Take photos of the existing wiring before disconnecting any wires for future reference. Ensure the thermostat is suitable for your specific heating and cooling setup. If unsure, consult a professional HVAC technician. Additionally, register your thermostat with your Alarm.com account to enable remote control and smart home integration features. Always follow safety guidelines and manufacturer instructions to prevent damage or injury.
2.2 Step-by-Step Installation Guide
Power off your HVAC system at the circuit breaker to ensure safety.
Verify system compatibility and take photos of existing wiring for reference.
Mount the thermostat base to the wall, ensuring level placement.
Connect the wires to the appropriate terminals, matching your system’s configuration.
Restore power and test the thermostat’s basic functionality.
Sync the thermostat with your Alarm;com account for remote control features.
Follow on-screen prompts in the app to complete setup and configuration.
Test all modes (Heat, Cool, Auto) to ensure proper operation.
For detailed wiring diagrams and specific instructions, refer to the provided manual or consult a professional if unsure.
2.3 Wiring Considerations and Diagrams
Before wiring, ensure the system is powered off at the circuit breaker. Take photos of the existing wiring for reference. Verify the system is 24 VAC; high-voltage systems (120/240V) require professional installation. Match the wires to the thermostat terminals using the provided diagram:
– R (red) for power,
– W (white) for heat,
– Y (yellow) for cooling,
– G (green) for fan, and
– C (common).
If your system lacks a C wire, check for a compatible adapter. Avoid mixing high-voltage wires with the thermostat terminals. Refer to the wiring diagram in the manual for specific configurations. If unsure, consult a licensed HVAC professional to prevent damage or safety hazards. Proper wiring ensures reliable operation and safety.
2.4 Post-Installation Setup and Configuration
After installation, restore power to the system at the circuit breaker. Sync the thermostat with your Alarm.com account by logging in at www.alarm.com/login. On the device, tap the screen to wake it up and follow the in-app prompts to complete the setup. Configure basic settings like temperature limits, humidity levels (if applicable), and scheduling preferences. Use the Alarm.com app to enable smart features such as geofencing, energy reports, and remote temperature adjustments. Ensure all wiring connections are correct and test the system by running a heating or cooling cycle. For advanced configurations, refer to the manual or contact Alarm.com support. Proper setup ensures optimal performance and energy efficiency.

Features and Functionality
The Alarm.com Thermostat offers advanced temperature control modes, smart home integration, and energy-saving scheduling. It also features humidity monitoring and remote access via the Alarm.com app for seamless control.
3.1 Temperature Control Modes (Heat, Cool, Auto)
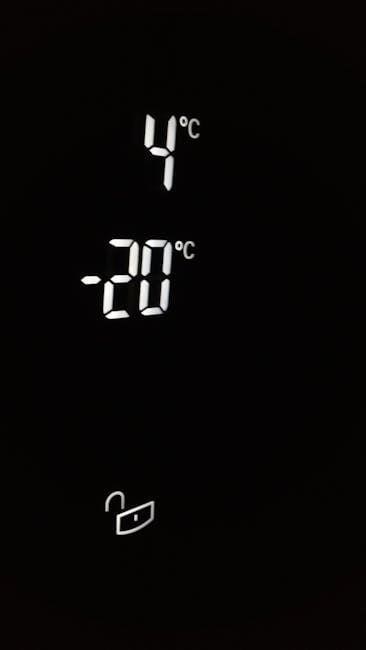
The Alarm.com Thermostat offers three primary temperature control modes: Heat, Cool, and Auto. In Heat mode, the system warms your home to the set temperature. Cool mode ensures your space stays at a comfortable cool temperature. Auto mode allows the thermostat to automatically switch between heating and cooling based on the current temperature and your settings. This feature optimizes energy usage and maintains a consistent indoor climate. You can adjust these modes manually or schedule them via the Alarm.com app. Additionally, the thermostat supports dual setpoints in Auto mode, letting you set different targets for heating and cooling, which enhances efficiency and comfort. Proper use of these modes can lead to significant energy savings and improved home comfort.
3.2 Smart Home Integration Capabilities
The Alarm.com Thermostat seamlessly integrates with smart home systems, enhancing your home automation experience. It is compatible with Z-Wave networks, allowing it to work alongside other smart devices. This integration enables centralized control of your home’s temperature, security, and energy management through the Alarm.com app or website. Voice control is also supported, letting you adjust settings using platforms like Amazon Alexa or Google Assistant. Remote access allows you to monitor and adjust your thermostat from anywhere, ensuring optimal comfort and energy efficiency. The thermostat can also be programmed to respond to system events, such as arming or disarming your security system. With smart home integration, you can create a unified and responsive environment that adapts to your lifestyle and preferences.
3.3 Scheduling and Energy-Saving Features
The Alarm.com Thermostat offers robust scheduling and energy-saving features to optimize your heating and cooling usage. Create custom temperature schedules tailored to your daily routines, ensuring comfort while reducing energy waste. Geofencing technology automatically adjusts settings based on your location, switching to energy-saving modes when you leave home. The thermostat also learns your preferences over time, adapting to your lifestyle for greater efficiency. Energy usage reports provide insights into your consumption patterns, helping you identify opportunities to save. Additionally, features like automatic temperature adjustments during sleep or vacation modes ensure your system operates efficiently even when you’re not actively managing it. These advanced tools empower you to balance comfort and energy savings seamlessly, making your home more eco-friendly and cost-effective. Regular updates and optimizations further enhance the thermostat’s ability to conserve energy without compromising performance.
3.4 Humidity Control and Monitoring
The Alarm.com Thermostat offers advanced humidity control and monitoring features to maintain optimal indoor air quality. It allows you to track humidity levels in real-time, ensuring your home remains comfortable and free from excessive moisture. The thermostat can automatically adjust your HVAC system to balance humidity, preventing issues like mold growth or dry air. Customizable humidity setpoints enable you to tailor the environment to your preferences. Additionally, the thermostat integrates seamlessly with compatible whole-house humidifiers and dehumidifiers, providing precise control. Remote monitoring through the Alarm.com app lets you check humidity levels and adjust settings from anywhere. This feature not only enhances comfort but also helps protect your home from potential damage caused by high or low humidity. By maintaining balanced humidity levels, the thermostat contributes to a healthier and more energy-efficient living space.

Operation and Usage
Learn how to efficiently operate your Alarm.com Thermostat, including daily functions, temperature adjustments, and remote control via the app. This section covers basic usage and key features.
4.1 Daily Operation and Basic Functions
Your Alarm.com Thermostat is designed for seamless daily operation. Start by tapping the screen to wake it up, and it will display the current temperature, mode, and greeting. Use the touchscreen or the Alarm.com app to adjust settings, set schedules, or switch between modes like Heat, Cool, or Auto. The thermostat also supports special modes such as Away, Sleep, and Vacation to optimize energy usage. For remote control, open the Alarm.com app, navigate to the thermostat card, and make adjustments from anywhere. Ensure your system is connected to Wi-Fi for uninterrupted functionality. Regularly check the humidity levels and adjust settings as needed. If issues arise, refer to the troubleshooting section for solutions. Always verify that your system is set to 24 VAC before making changes. This guide helps you master daily operations and basic functions efficiently.
4.2 Adjusting Temperature and Settings
Adjusting the temperature and settings on your Alarm.com Thermostat is straightforward. Use the touchscreen interface to increase or decrease the desired temperature by tapping the up or down arrows. In Auto mode, two sets of arrows appear, allowing you to control both heating and cooling targets. To switch modes, navigate to the mode selection menu and choose Heat, Cool, or Auto. Special modes like Away, Sleep, or Vacation can also be activated for energy efficiency. For remote adjustments, open the Alarm.com app, select the thermostat card, and modify settings as needed. You can also adjust humidity levels if your system supports it. To customize schedules or energy-saving preferences, access the settings menu. Always ensure your system is set to 24 VAC before making changes. Refer to this manual for advanced configuration options and troubleshooting tips.
4.3 Using the Alarm.com App for Remote Control
The Alarm.com app offers seamless remote control of your thermostat. Download and install the app on your iOS or Android device, then log in to your Alarm.com account to sync your thermostat. Once connected, you can adjust the temperature, switch modes, and access advanced settings from anywhere. Use the app to set schedules, enable energy-saving features, or activate special modes like Away or Sleep. The app also allows you to monitor current temperature, humidity levels, and system status. For remote adjustments, tap the thermostat card in the app, then use the arrows to increase or decrease the target temperature. Ensure your thermostat is synced with your Alarm.com system for full functionality. Refer to the manual for troubleshooting connectivity issues or login problems. The app is a convenient tool for managing your thermostat and optimizing energy usage remotely.
4.4 Special Modes (Away, Sleep, Vacation)
The Alarm.com thermostat offers special modes to optimize comfort and energy savings. Away Mode adjusts the temperature to conserve energy when you’re not home, while Sleep Mode ensures a comfortable temperature during nighttime hours. Vacation Mode allows you to set a consistent temperature range, preventing extreme highs or lows while you’re away for an extended period. These modes can be activated manually or scheduled via the app. Use Away Mode for daily commutes, Sleep Mode for restful nights, and Vacation Mode for extended trips. Adjust settings through the app or thermostat interface to customize your preferences. Enable these modes to balance energy efficiency and comfort seamlessly. Refer to the manual for step-by-step instructions on setting up and managing these modes effectively.

Troubleshooting Common Issues
Identify and resolve common thermostat issues using error codes, connectivity checks, and reset options. Refer to the manual for detailed solutions or contact Alarm.com support for assistance.
5.1 Common Error Codes and Solutions
Alarm.com thermostats may display error codes to indicate specific issues. For example, E1 often relates to connectivity problems, while E2 might signal a temperature sensor malfunction. E3 could indicate communication failures with the HVAC system. To resolve these, ensure your system is powered correctly and check wiring connections. If E1 persists, verify your Wi-Fi network stability or restart the thermostat. For E2, inspect the temperature sensor for obstructions or damage. E3 may require resetting the thermostat or ensuring proper system compatibility. Always refer to the manual for detailed troubleshooting steps or contact Alarm.com support for advanced assistance. Regularly updating your thermostat’s software can also prevent recurring issues.
5.2 Resetting the Thermostat to Factory Settings
Resetting your Alarm.com thermostat to factory settings can resolve persistent issues. To perform a factory reset, press and hold the “Menu” button while simultaneously pressing the “Down” arrow for 5 seconds. Release the buttons when the screen confirms the reset. This action will erase all custom settings, so ensure you have backed up your preferences. If using the Alarm.com app, navigate to the thermostat settings, select “Advanced,” and choose “Factory Reset.” After resetting, restore power to the system at the circuit breaker and allow the thermostat to reboot. Once completed, reconfigure your settings through the app or website. This process restores default parameters, ensuring optimal performance. Always verify that the system is compatible with your HVAC setup after a factory reset. Contact support if issues persist.
5.3 Diagnosing Connectivity Problems
If your Alarm.com thermostat experiences connectivity issues, start by checking your internet connection and router. Ensure the thermostat is enrolled in the Z-Wave network and synced with your Alarm.com account. Restart your router and modem, then wait 30 seconds before turning them back on. Verify that the thermostat’s LED indicator shows a solid connection status. If issues persist, log into the Alarm.com app or website to check for synchronization errors. Ensure the thermostat’s firmware is up to date, as outdated software can cause connectivity problems. If the thermostat displays an error code, refer to the troubleshooting section for specific solutions. Contact Alarm.com support for further assistance if connectivity issues remain unresolved. Always ensure the system is powered on and properly configured before attempting diagnostics.
5.4 When to Contact Professional Support
If you encounter issues that cannot be resolved through basic troubleshooting, it is essential to contact professional support. Seek assistance if error codes persist, connectivity problems remain unresolved, or if the thermostat fails to sync with your Alarm.com account. Additionally, contact support if your system exhibits unusual behavior, such as incorrect temperature readings or unresponsiveness to commands. Professional help is also recommended for complex wiring issues or compatibility problems with your HVAC system. If you are unsure about any step in the troubleshooting process, reaching out to Alarm.com support can prevent further complications. Always follow safety guidelines and contact certified professionals for any advanced repairs or configurations. Ensure to use official Alarm.com support channels for reliable assistance. Regular updates and maintenance can often prevent such issues, but professional intervention is crucial when they arise.
Maintenance and Updates
Regularly clean the thermostat, update its software, and replace batteries if applicable. Perform seasonal checks to ensure optimal performance and energy efficiency throughout the year.
6.1 Cleaning and Upkeeping the Thermostat
Regular cleaning and upkeep are essential to maintain your Alarm.com thermostat’s performance. Use a soft, dry cloth to wipe the touchscreen and exterior surfaces. Avoid harsh chemicals or damp cloths, as they may damage the device. Ensure proper airflow by keeping vents clear and checking for dust buildup. For sensors, gently clean with a dry cotton swab to prevent accuracy issues. Periodically inspect and replace air filters if connected to your HVAC system. Resetting the thermostat to factory settings can also help resolve minor issues. Always refer to the manual for specific cleaning instructions tailored to your model. Proper maintenance ensures energy efficiency, accurate temperature control, and prolonged device longevity. Regular upkeep also helps prevent connectivity problems and maintains seamless smart home integration.
6.2 Updating the Thermostat Software
To ensure optimal performance, regularly update your Alarm.com thermostat software. Updates can be done via the Alarm.com app or website. Log in to your account, navigate to the thermostat settings, and check for available updates. Follow the on-screen instructions to download and install the latest version. Some updates may require the thermostat to restart, which is normal. Always ensure the device is connected to the internet during the update process. If issues arise, refer to the manual or contact Alarm.com support. Keeping the software up-to-date ensures improved functionality, enhanced security, and access to new features. Regular updates also help maintain compatibility with your smart home system and improve energy-saving capabilities. Stay informed about the latest software versions to keep your thermostat running smoothly and efficiently.
6.3 Replacing Batteries (if applicable)
Certain Alarm.com thermostat models may require battery replacement for backup power during outages. If your thermostat uses batteries, they are typically CR2032 or CR2450 lithium batteries. Replace them every 2-3 years or when the battery level indicator shows low power. To replace, power down the system, remove the old batteries, and insert new ones with the correct polarity. Ensure the thermostat is restarted and synced with your Alarm.com account. Dispose of used batteries responsibly. Always use compatible battery types to avoid damage. If your thermostat does not have a battery compartment, it likely relies on a 24VAC power supply. Refer to your specific model’s manual for confirmation. Regular battery checks ensure uninterrupted performance and smart home integration functionality. Update your settings post-replacement to maintain optimal operation.
6.4 Seasonal Maintenance Checks
Perform seasonal maintenance checks on your Alarm.com thermostat to ensure optimal performance and energy efficiency. Before each heating and cooling season, inspect the thermostat’s display and sensors for accuracy. Clean the device with a soft cloth to remove dust and debris. Verify that all wiring connections are secure and not corroded. Check the system’s air filters and replace them as needed to maintain airflow and efficiency. Ensure the thermostat is properly synced with your HVAC system and Alarm.com account. Review your temperature schedules and adjust them for seasonal changes. Test special modes like Away and Vacation to confirm they function correctly. These checks help prevent issues and ensure your thermostat operates efficiently throughout the year. Regular maintenance also supports energy-saving features and extends the life of your system. Always refer to your manual for model-specific recommendations. Proper upkeep ensures reliable operation and comfort in every season.