Jell-O No-Bake Crust Mix offers a convenient and easy way to create delicious dessert bases without baking. Perfect for cheesecakes and pies, it requires minimal ingredients and effort, making it a favorite for home bakers seeking quick, tasty results.
Overview of No-Bake Desserts
No-bake desserts are a convenient and time-saving alternative to traditional baked treats. They typically require minimal ingredients and effort, making them perfect for quick preparations. These desserts often use pre-made mixes or simple combinations of cream, fruit, and crusts. Popular no-bake options include cheesecakes, pies, and pudding-based desserts. Jell-O No-Bake Crust Mix simplifies this process further, offering a ready-to-use base for creating delicious desserts without the need for an oven. This method is ideal for home bakers seeking easy, tasty results year-round.
What is Jell-O No-Bake Crust Mix?
Jell-O No-Bake Crust Mix is a pre-packaged dessert base designed for effortless preparation. It contains a blend of ingredients that form a sturdy yet flavorful crust when mixed with simple additions like butter and sugar. This mix eliminates the need for baking, making it perfect for quick dessert solutions. It’s ideal for creating cheesecakes, pies, and other sweet treats with minimal effort, ensuring a delicious and consistent result every time. The mix is user-friendly and accelerates the dessert-making process, appealing to both novice and experienced bakers alike.
Ingredients and Tools Needed
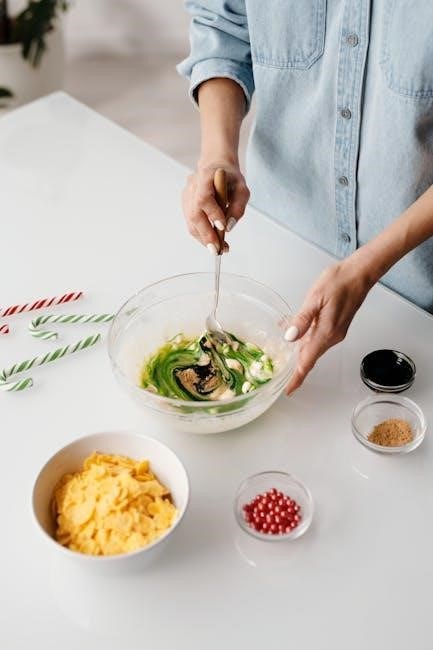
For Jell-O No-Bake Crust Mix, you’ll need the mix itself, melted butter, and sugar. Essential tools include a mixing bowl, spoon, and a baking pan for pressing the crust.
Components of the Crust Mix
The Jell-O No-Bake Crust Mix typically contains pre-mixed graham cracker crumbs, sugar, and stabilizers for easy preparation. It may also include leavening agents or flavor enhancers to ensure a perfect texture and taste. The mix is designed to simplify the process, providing a consistent base for desserts like cheesecakes or pies. Simply combine it with melted butter to create a sturdy, flavorful crust that holds together beautifully without baking. The convenience of this mix makes it a popular choice for quick dessert solutions.
Additional Ingredients Required
Beyond the Jell-O No-Bake Crust Mix, you’ll need melted butter to bind the crust mixture together. This ensures the crust holds its shape and has a smooth texture. Some recipes may also suggest adding a small amount of sugar for extra sweetness, depending on your preference. Ensure all ingredients are at room temperature for optimal mixing. These simple additions transform the mix into a ready-to-use crust, making your dessert preparation quick and straightforward. Always follow the package instructions for precise measurements and best results.
Essential Tools for Preparation
To prepare the Jell-O No-Bake Crust Mix, you’ll need a mixing bowl, a spoon or spatula for combining ingredients, and a pan to press the crust into. A measuring cup is handy for adding melted butter and sugar. For portion control, muffin tins with paper liners work well. A flat-bottomed tool, like the back of a spoon, helps press the crust firmly into the pan. Finally, a refrigerator is necessary for chilling the crust to set it properly before adding the filling. These tools ensure a smooth and efficient preparation process.
Safety Tips and Precautions
Always handle the crust mix with clean hands and utensils. Check expiration dates and store in a cool, dry place. Avoid cross-contamination and chill properly for food safety.
Handling the Crust Mix Safely
When handling Jell-O No-Bake Crust Mix, ensure your hands and tools are clean to prevent contamination. Avoid inhaling the mix to prevent respiratory irritation. Store in a cool, dry place away from direct sunlight. Check the expiration date before use and discard any expired or spoiled product. Keep out of reach of children and pets. Wash hands thoroughly after handling. Proper handling ensures a safe and enjoyable dessert preparation experience.
Storage and Expiry Considerations
Store Jell-O No-Bake Crust Mix in a cool, dry place away from direct sunlight. Ensure the packaging is sealed tightly to maintain freshness. Always check the expiration date printed on the package before use. If stored properly, the mix typically remains usable for up to 12 months. Avoid refrigerating or freezing, as this may alter its texture. Discard any expired or spoiled product to ensure optimal flavor and safety. Proper storage ensures the crust mix remains fresh and ready for use in your no-bake desserts.

Step-by-Step Instructions
- Mix the crust mix with melted butter and sugar until well combined.
- Press the mixture firmly into the prepared pan.
- Chill in the refrigerator until set.
- Add your preferred no-bake filling and refrigerate until ready to serve.
Preparing the Crust Mix
To prepare the Jell-O No-Bake Crust Mix, start by opening the package and pouring the contents into a medium-sized bowl. Add the required amount of melted butter and sugar, mixing until the mixture is smooth and evenly combined. Use a spoon or spatula to ensure all crust mix particles are well incorporated. Avoid overmixing, as this can make the crust dense. Once the mixture is ready, it’s ready to be pressed into your desired pan shape. Ensure the bowl is large enough to mix thoroughly without spilling. Chilling the crust before adding the filling helps it set properly.
Mixing the Crust Ingredients
Mixing the crust ingredients is a straightforward process that ensures a smooth and even texture. Start by combining the Jell-O No-Bake Crust Mix with the recommended amount of melted butter and sugar in a large bowl. Use a spoon or spatula to mix until all ingredients are well incorporated. Be careful not to overmix, as this can make the crust dense. Continue mixing until the mixture forms a uniform consistency, with no visible dry spots. This step is crucial for achieving the perfect texture and ensuring the crust holds together firmly once chilled.
Pressing the Crust into the Pan
Pressing the crust mixture into the pan is a critical step for achieving a smooth, even base. Using a spatula or your fingers, firmly press the mixture into the bottom of a greased pan, ensuring complete coverage. Apply even pressure to avoid uneven thickness, which can lead to cracking or crumbling. For larger pans, use a flat-bottomed tool or the back of a spoon to spread the crust evenly. Make sure the edges are well-pressed to maintain shape and prevent breakage when serving. This step ensures a sturdy and intact crust for your dessert.
Chilling the Crust
Chilling the crust is essential to ensure it sets properly and holds its shape. Place the pan with the pressed crust in the refrigerator for at least 30 minutes. This step allows the ingredients to bind together firmly, creating a stable base for your dessert. For an even firmer texture, you can chill it for up to an hour. Avoid freezing, as it may make the crust too hard. Once set, the crust is ready for filling. Proper chilling ensures the crust remains intact and enhances the overall presentation of your dessert.
Adding the Filling
Once the crust is chilled and set, carefully pour or spread your prepared filling evenly over the crust. Ensure the filling covers the entire surface without leaving air pockets. Gently smooth the top with a spatula for a uniform appearance. If using a Jell-O dessert mix, follow the package instructions for preparing the filling before pouring it into the crust. Allow the filling to set in the refrigerator for at least 30 minutes to ensure proper bonding with the crust. This step completes your no-bake dessert, making it ready to serve.
Tips for a Perfect Crust
Press the crust mixture firmly into the pan for a solid base. Use the recommended amount of butter to avoid sogginess. Ensure even distribution and chill properly.
Ensuring the Right Texture
Achieving the perfect texture for your Jell-O No-Bake Crust involves balance and precision. Ensure the crust mixture is well-combined but not overmixed to maintain its crumbly yet cohesive structure. Pressing the mixture firmly into the pan is crucial for a stable base. Avoid adding too much butter, as it can make the crust soggy, while too little may result in a crumbly texture. Chilling the crust adequately allows it to set properly, ensuring it holds its shape when filled. Proper preparation guarantees a smooth, even base for your dessert.
Avoiding Common Mistakes
Common mistakes when using Jell-O No-Bake Crust Mix include overmixing, which can lead to a dense crust, and insufficient pressing, resulting in a crumbly base. Using too much butter can make the crust soggy, while too little may cause it to fall apart. Ensure the crust is pressed firmly and evenly into the pan for a stable structure. Avoid chilling the crust for too long, as it may become too hard. Follow the instructions precisely to achieve a smooth, even texture and a perfectly set crust for your dessert.
Customization and Variations
Easily customize your crust by adding flavor extracts like vanilla or cocoa. Mix in crushed nuts or cookies for texture. Experiment with different fillings, such as fruit curds or puddings, for unique desserts.
Adding Flavor Variations
Elevate your crust by incorporating unique flavors. Add a teaspoon of vanilla extract for a classic twist or a pinch of cocoa powder for a chocolatey base. Experiment with spices like cinnamon or nutmeg for warmth, or mix in citrus zest for brightness. For a crunchy texture, fold in chopped nuts, cookie crumbs, or even candy pieces. These additions enhance the crust’s taste and create a personalized touch for your no-bake desserts, making them stand out with minimal effort.
Using Different Types of Fillings
The versatility of Jell-O No-Bake Crust Mix allows pairing with a wide variety of fillings. Classic options include Jell-O pudding mixes, such as strawberry or lemon, for a fruity dessert. For a creamier treat, try using a cheesecake filling or a mixture of cream cheese and powdered sugar. Experiment with layered desserts by combining pudding, fresh fruit, or even Nutella for a chocolate-hazelnut twist. The crust complements both sweet and tangy fillings, making it a versatile base for countless dessert creations.
Troubleshooting Common Issues
Common issues with Jell-O No-Bake Crust Mix include crust not setting or becoming too crumbly. Check expiry dates, avoid overmixing, and ensure correct butter proportions for best results.
Crust Not Setting Properly
If the crust doesn’t set properly, it may be due to incorrect mixing ratios or insufficient chilling time. Ensure the crust mix is combined with the right amount of melted butter and pressed firmly into the pan. Avoid overmixing, as this can create air pockets; Refrigerate for at least 30 minutes to allow the crust to harden. If it’s still soft, check the expiry date of the mix or verify if all ingredients were added correctly; Proper chilling is essential for a firm, stable base.
Crust Too Crumbly or Too Hard
If the crust is too crumbly, it may lack sufficient butter or was not pressed firmly enough. If it’s too hard, excess butter or over-compression could be the cause. Ensure the correct amount of melted butter is used and press the mixture evenly. Avoid overmixing, as this can make the crust dense. If the crust becomes too hard, letting it sit at room temperature for a few minutes before serving can soften it slightly. Always check the mix’s expiry date, as stale ingredients can affect texture. Adjusting the butter quantity or pressing technique can help achieve the perfect consistency.

Pairing with Jell-O Desserts
The Jell-O No-Bake Crust Mix pairs perfectly with various Jell-O desserts, offering a versatile base for strawberry, raspberry, or lemon flavors. Its texture complements the smoothness of Jell-O fillings, creating a delightful contrast that enhances the overall dessert experience. This crust is ideal for crafting layered desserts, allowing creative combinations that showcase both the crust and the Jell-O beautifully.
Matching Crust with Filling Flavors
The Jell-O No-Bake Crust Mix has a neutral flavor, making it versatile for various fillings. For a classic combination, pair it with strawberry or raspberry Jell-O for a sweet and tangy dessert. Lemon-flavored fillings also complement the crust nicely, offering a refreshing twist. When using creamy fillings, the crust provides a sturdy base without becoming soggy. Ensure the crust is fully set before adding the filling to maintain texture. For a personalized touch, match the crust flavor to your filling by adding a hint of citrus zest or cocoa powder.
Creating Layered Desserts
Layered desserts add visual appeal and texture to your creations. Start with the Jell-O No-Bake Crust as the base, then add a layer of Jell-O gelatin, followed by whipped cream or pudding. For a fruity twist, incorporate fresh berries or fruit slices between layers. This method allows each component to shine while maintaining a cohesive flavor profile. Experiment with colors and textures for a stunning presentation that’s both delicious and Instagram-worthy. This technique is perfect for special occasions or potlucks, ensuring your dessert stands out.
Storage and Serving Tips
Store the prepared crust in an airtight container in the refrigerator for up to 3 days. For serving, chill until set, then slice evenly for perfect portions.
Storing the Prepared Crust
To maintain freshness, store the prepared crust in an airtight container in the refrigerator at 40°F (4°C) or below. Ensure the container is sealed tightly to prevent moisture and odors from affecting the crust. If not using immediately, you can store it for up to 3 days. For longer storage, consider freezing the crust in an airtight container or freezer-safe bag for up to 2 months. Allow the crust to thaw in the refrigerator before use.
Serving Suggestions
Enhance your dessert by topping the crust with fresh fruits, whipped cream, or chocolate shavings for a decorative touch. Serve chilled for the best texture and flavor. Pair with complementary fillings like strawberry or chocolate for a balanced taste. Consider adding a drizzle of caramel or nuts for extra crunch and flavor. For clean slices, dip your knife in warm water before cutting. These tips will ensure your no-bake crust creation is both visually appealing and delicious, perfect for any gathering or special occasion.
Nutritional Information
Jell-O No-Bake Crust Mix contains approximately 120 calories per serving, 25g carbs, and 10g sugars. It offers minimal fat and protein but includes calcium and iron.
Calorie and Nutrient Content
Jell-O No-Bake Crust Mix contains approximately 120 calories per serving, with 25g of carbohydrates and 10g of sugars. It provides minimal fat and protein, making it a low-nutrient but tasty base. The mix includes small amounts of calcium and iron, contributing to its nutritional value. However, it lacks significant vitamins or fiber, so pairing it with nutrient-rich fillings is recommended for a balanced dessert. Always check the packaging for precise nutritional details, as values may vary based on portion size and added ingredients.
Healthier Alternatives
For a healthier crust, consider using whole-grain or nut-based alternatives to traditional mixes. Almond flour or oats provide more fiber and nutrients. You can also make homemade versions using dates, nuts, and coconut oil, which reduce refined sugars and artificial additives. These options offer better nutritional profiles while maintaining the crust’s texture and flavor. Experimenting with natural binders like honey or flax eggs can enhance the crust’s health benefits, making it a guilt-free base for your desserts.
Jell-O No-Bake Crust Mix simplifies dessert preparation, offering ease, convenience, and delicious results. Perfect for quick treats, it’s a versatile solution for home bakers of all skill levels.
Final Thoughts on Jell-O No-Bake Crust Mix
Jell-O No-Bake Crust Mix is a game-changer for quick and delicious desserts. Its simplicity makes it ideal for both novice and experienced bakers. With minimal ingredients and no baking required, it saves time while delivering professional results. The mix is versatile, pairing well with various fillings like cheesecake, pudding, or fruit, allowing for endless customization. Perfect for parties, potlucks, or family gatherings, it’s a convenient solution for creating mouthwatering treats effortlessly. Whether you’re short on time or skill, this mix ensures a perfect crust every time.